Photography enthusiasts often talk about the “golden hours”, which refers to the periods shortly after sunrise and just before sunset. This is when the light is soft, warm, and diffused, casting everything in a magical glow. For those lucky enough to camp next to a dam, the combination of serene waters, natural surroundings, and the changing light offers a unique opportunity to capture breathtaking photographs.
In this guide, we’ll dive into how to make the most of this special time of day, offering practical tips to help you capture the perfect golden hour photo by a dam.
The golden hours are prized by photographers for the warm, directional light they offer. At sunrise and sunset, the sun is low in the sky, which means the light has to pass through more of the Earth’s atmosphere. This softens the harshness of the sun’s rays, reducing the intensity of shadows while bathing the landscape in a warm, golden hue.
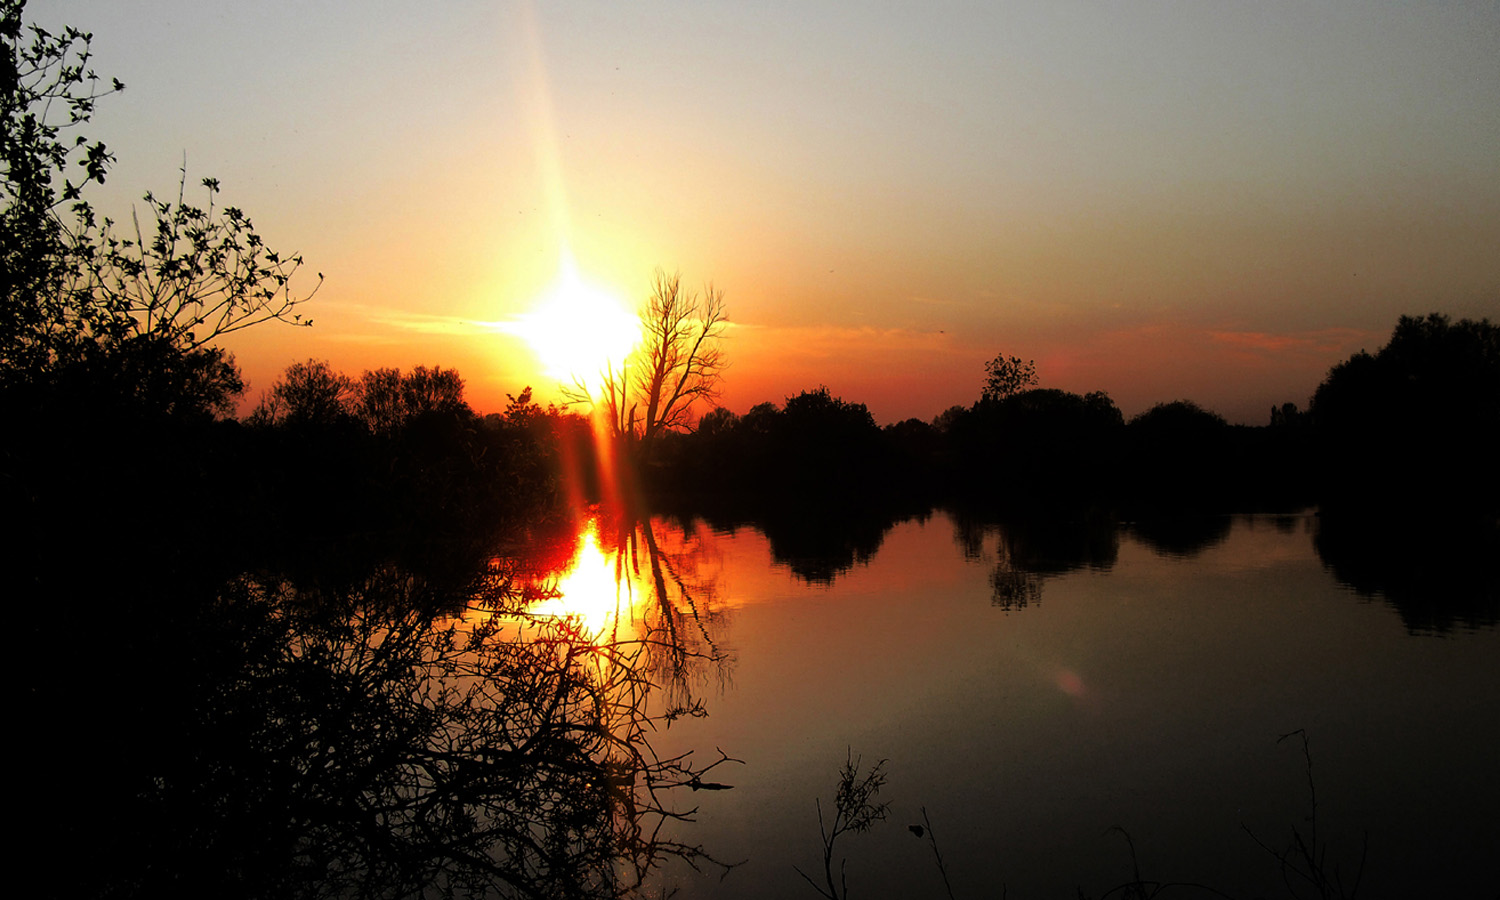
At a dam, this lighting creates a perfect balance between land and water. The soft glow illuminates the surrounding landscape, while the stillness of the water reflects these tones, creating mirror-like images. These reflections can be one of the most powerful elements in a photo.
Check your local times for sunrise and sunset. The golden hour doesn’t last long, so plan ahead to make sure you’re in position with your camera ready to capture the fleeting light.
One of the most captivating features of photographing a dam at dawn or dusk is the reflection of the sky on the water’s surface. Calm water acts like a natural mirror, offering a perfect opportunity to create symmetrical and visually balanced compositions. Whether you’re photographing the sky, trees, or nearby mountains, these reflections can double the impact of your image.
Composition is key when capturing golden hour photos. One of the most effective techniques you can use by a dam is the concept of leading lines. Leading lines naturally guide the viewer’s eye through the image toward a focal point. The edge of the dam, a dock, or even the shoreline can serve as leading lines to direct the viewer toward the glowing sky or shimmering reflections.
The colours during golden hour are unlike any other time of day. At dawn, expect soft blues, pinks, and purples before the sun peeks over the horizon, gradually transitioning into warm oranges and yellows. Dusk offers a reverse transition, with fiery reds and oranges fading into cooler tones as night falls.
Silhouettes can be a powerful element in dusk and dawn photography, adding drama and intrigue to your images. With the sun low on the horizon, you can position a subject between your camera and the light source. The result is a dark outline of the subject, contrasted against the colourful backdrop of the sky and its reflection in the water.
While golden hour light is soft and flattering, it also means you’ll be working in lower light conditions, especially as the sun dips further below the horizon. To avoid blurry images, you’ll need to adjust your camera settings accordingly.
The sky is constantly changing during dusk and dawn, which means you have a limited window to capture the perfect moment. Don’t be afraid to take multiple shots in quick succession. The colours and light can change dramatically in just a few minutes.
While you’ll want to capture the best image possible in-camera, a little post-processing can go a long way in enhancing your dusk or dawn photos. In particular, you can adjust the contrast, brightness, and saturation to make the colours pop even more.
Dusk and dawn photography by a dam offers a rich canvas of colours, reflections, and natural beauty. With the right techniques, you can capture stunning images that highlight the magic of golden hour. By focusing on composition, utilizing reflections, managing light, and taking advantage of the changing sky, you’ll be able to create memorable photographs that showcase the serene and captivating atmosphere of a dam at the most beautiful times of day. Happy shooting!
@ 2022 Copyright. Designed by